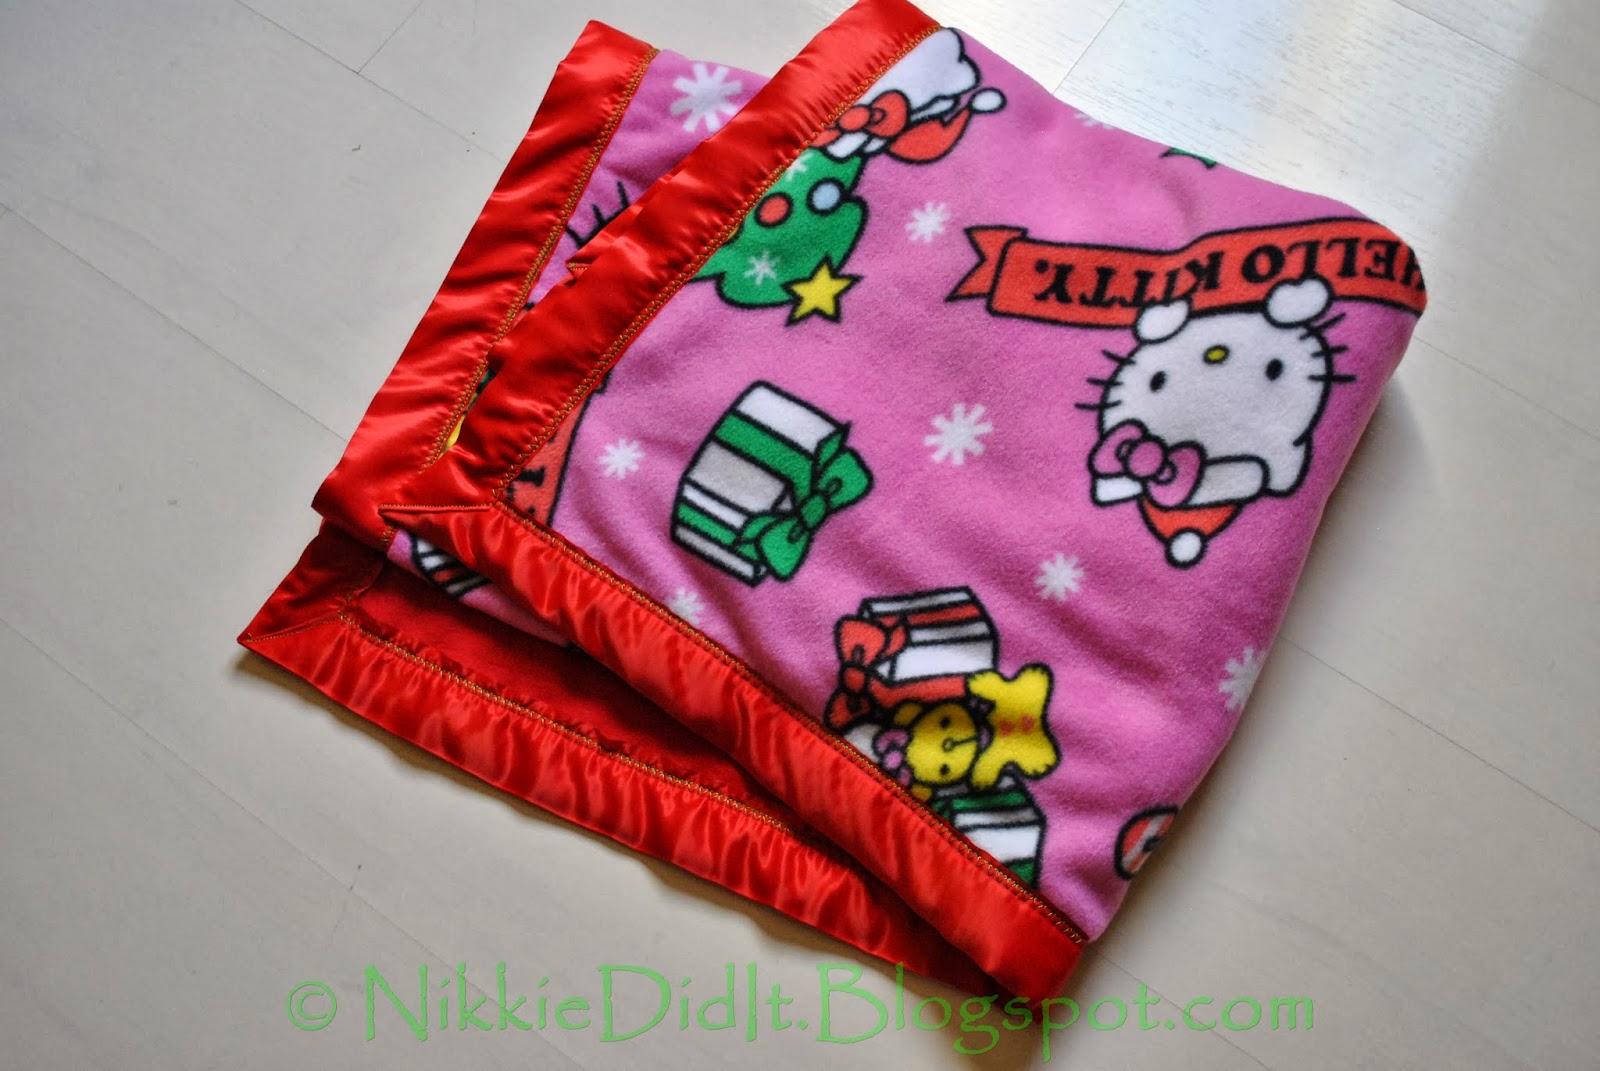
So I'm making my midget a simple but awesome blanket to tote around the house. She seems to love a soft and fuzzy blanket and I think this gives her what she wants. It made with 2 layers of fleece with satin border. Fleece is fairly easy to work with and you don't have to prewash it, which i love. But I just love a cozy blanket

Cozy DIY Blanket
Supplies:
- 1 yard of Fleece Print(i would get a 1/4 more of fabric but shes only 3 so 1 yard was perfect)
- 1 yard of matching fleece
- 5 yards or more of Satin Binding(your color choice & size, I used 1 and 2 inch)
- Needle, Thread, Sewing Machine
Instructions:
First I lined my fabrics up, trimming and making sure they lined up correctly. Now when you any printed, licensed, character prints you sometimes have what I refer to as a label at the bottom(selvage). I cut that off, unless you don't mind then keep it.


If your planning on doing rounded corners, this is the time to round your edges.


Once their lined up wrong sides facing each other, I pin and sew around once. I leave up to you if you want to do a zigzag stitch to better close edge, I didn't because I figured I'd be adding to this next year.


Now I pin on the border(you don't have too if your a Pro), be careful making sure its lined up as possible. Using either a straight stitch and then a zigzag stitch together, or if you have a cool stitch options like myself, use the one similar to #7(photo below).


The corners are tricky if your doing mitered corners). So if done right the mitered corners look nice and neat(remember this will be my first time attempting this process).Pinch the edge of the blanket and open up the satin. Bend the satin so that the corner of the satin and the corner of the blanket are at the same place, then close the satin so that there are satin folds coming out at 45 degree angles from the corner. Pin.


Now sandwich the rest of the blanket edge between the satin and pin to secure.
For rounded corners you simple trim fabric and cut half inch slits on rounded fabric edge and sew around corners(this is for large borders i was only doing 1 inch so I didn't have cut slits just trim)


Since the satin is slippery, the folding can get a little funky. I usually pin the back of the blanket then the front. Then put pins all the way through and remove the first ones. The trick is to get the 45 degree folds to line up on top of each other. When you sew, you want the zigzag stitch(crazy me, sewed a straight stitch and then figured out, a zigzag stitch was the right one. . . .but remember I'm learning) to straddle the two edges, so the folds you have to be symmetric to within your stitch width.


Most pin then stitch, I did one corner at a time. Do what works for you :)
For finishing the blanket, when you get to the last corner measure the satin binding to overlap beginning trim by 3". I did a zigzag stitch to close and there's my blanket. Took me less than hour and turned out not so bad. I made one for my nephew. Not too shabby if I say so myself. Now on to the pajamas, to complete the gift box.


Post a Comment